Welcome Back to Our YouTube Channel!
In today’s video, we’re excited to share a step-by-step guide on how to track commissions and split rates in QuickBooks Online. Let’s dive right in!
Accessing the QuickBooks Dashboard
Once you’re on the QuickBooks dashboard, navigate to the Sales tab. This section is crucial for managing your sales transactions effectively.
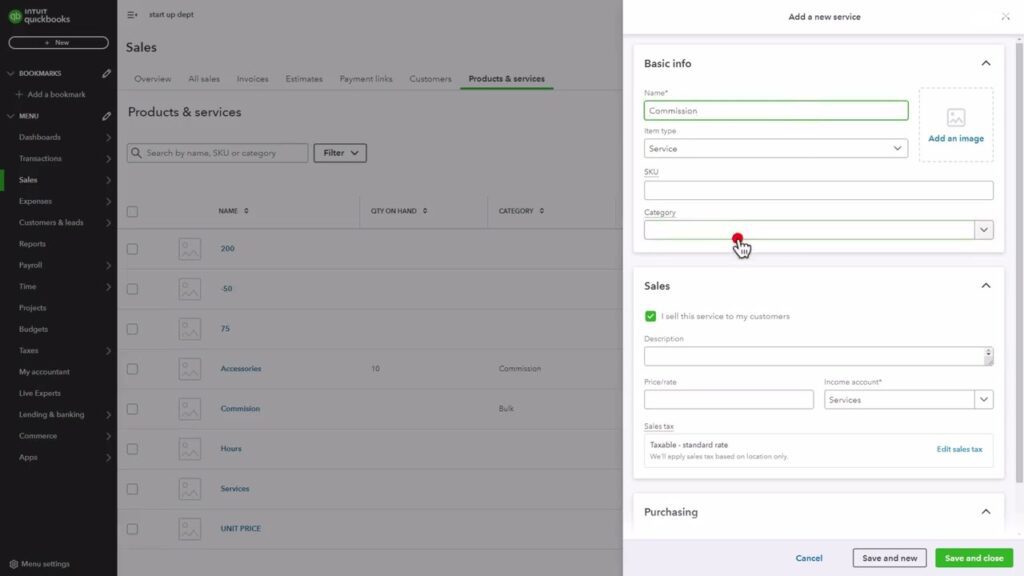
Create a New Service for Commission
- On the sales page, look for the Products and Services section.
- Click on the Create New button and select Service from the options.
- In the Name field, type "Commission."
- Next, in the Category section, select "Commission."
- After reviewing all the information, click on the Save and Close button located in the bottom right corner.
Creating an Invoice
Now that your commission service is set up, it’s time to create an invoice.
- Go to the Invoice section and click on the Create Invoice button.
- Choose the customer from the Add Customer dropdown.
- Add the products or services you provided, one by one. Make sure to account for the commission by including multiple services if necessary.
- Here, you can see the Subtotal and Sales Tax for your entries. Take a moment to double-check everything to ensure accuracy.
Reviewing and Sending the Invoice
After confirming that all details are correct, click on the Review and Send button.
- Enter the customer’s email address.
- Click on the Send Invoice button.
And just like that, you have successfully tracked commissions and split rates in QuickBooks Online!
Conclusion
Thank you for watching! We hope this guide helps you manage your commissions effectively. Stay tuned for more insights and tutorials in our next video!

 | Top Trending Niches for Dropshipping Success